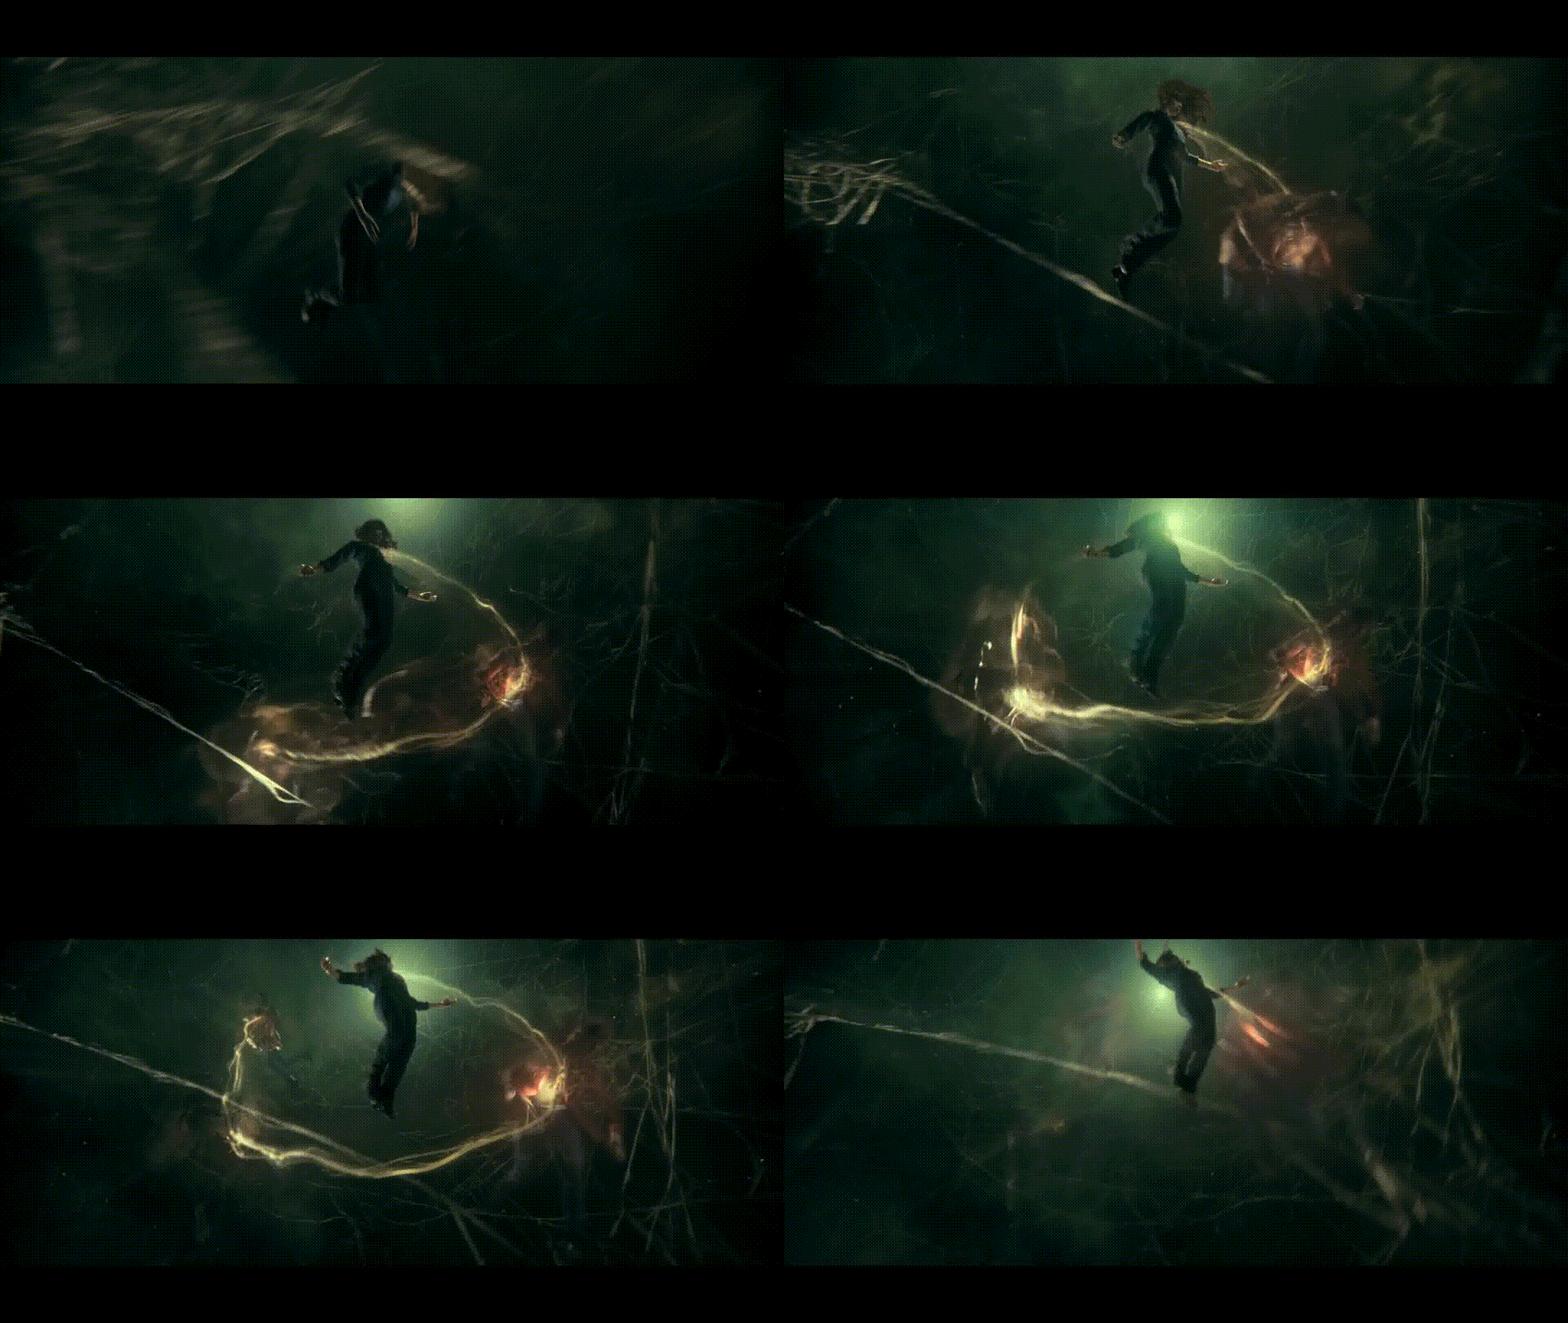
Whilst motion blur and correct motion blur in particular is something we all should strive towards as VFX artists, I’m going to dedicate this article to a technique I came up with on a recent project. If you read through it all I’ll show which project at the end. No scrolling/cheating!
I’m tempted to say it’s an original idea of mine, of which I don’t have many, but I wouldn’t be surprised if I picked it up from someone else. Either way, I thought I would share the idea here and if someone sees it and recognizes it from elsewhere, feel free to message me so I can acknowledge the source!
The basics
Consider this box (or square in the ortho view we’re seeing) peacefully traveling at a linear speed minding its own business. If you were to render that with motion blur it would do so without any issues, silky smooth.
 |
 |
The “gold standard” of 3D motion blur is when we are able to interpolate what’s happening with our geometry (and cameras) from one frame to another, allowing us to sample what happens inbetween the frames; the sub frames. In the case of a our box, it’s not all that interesting, as the motion is completely linear, but let’s see where we can take it. Let’s say for one reason or another we wanted to exaggerate the motion blur of our box; make it longer. We could tweak the shutter speed of our camera, but we’re interesting in getting familiar with sub frames in this article, so let’s leave the shutter speed as it is and see if we can make Houdini interpolate our animation in a different way, resulting in a different motion blur.
So if we consider rendering frame 1 with interpolated motion blur, the default behavior in a render engine like Arnold is most typically that whatever happens between frame 0.5 and 1.5 will contribute to the motion blurred frame. This is often referred to as “Centered” or “Central On Frame” motion blur. Mantra (Houdini) defaults to what it calls "after" or “Forward”, which is the equivalent to “Start on Frame” in Arnold.
Either way, in all my examples in this article I’ll be forcing everything to look before, backwards or “End On Frame”. This is crucial, as you would get very different results if you miss that setting!
 |
So above we have the same box, but this time we’re looking backwards much further than what the default interpolation would have done, and as a result we get this exaggerated blur effect.
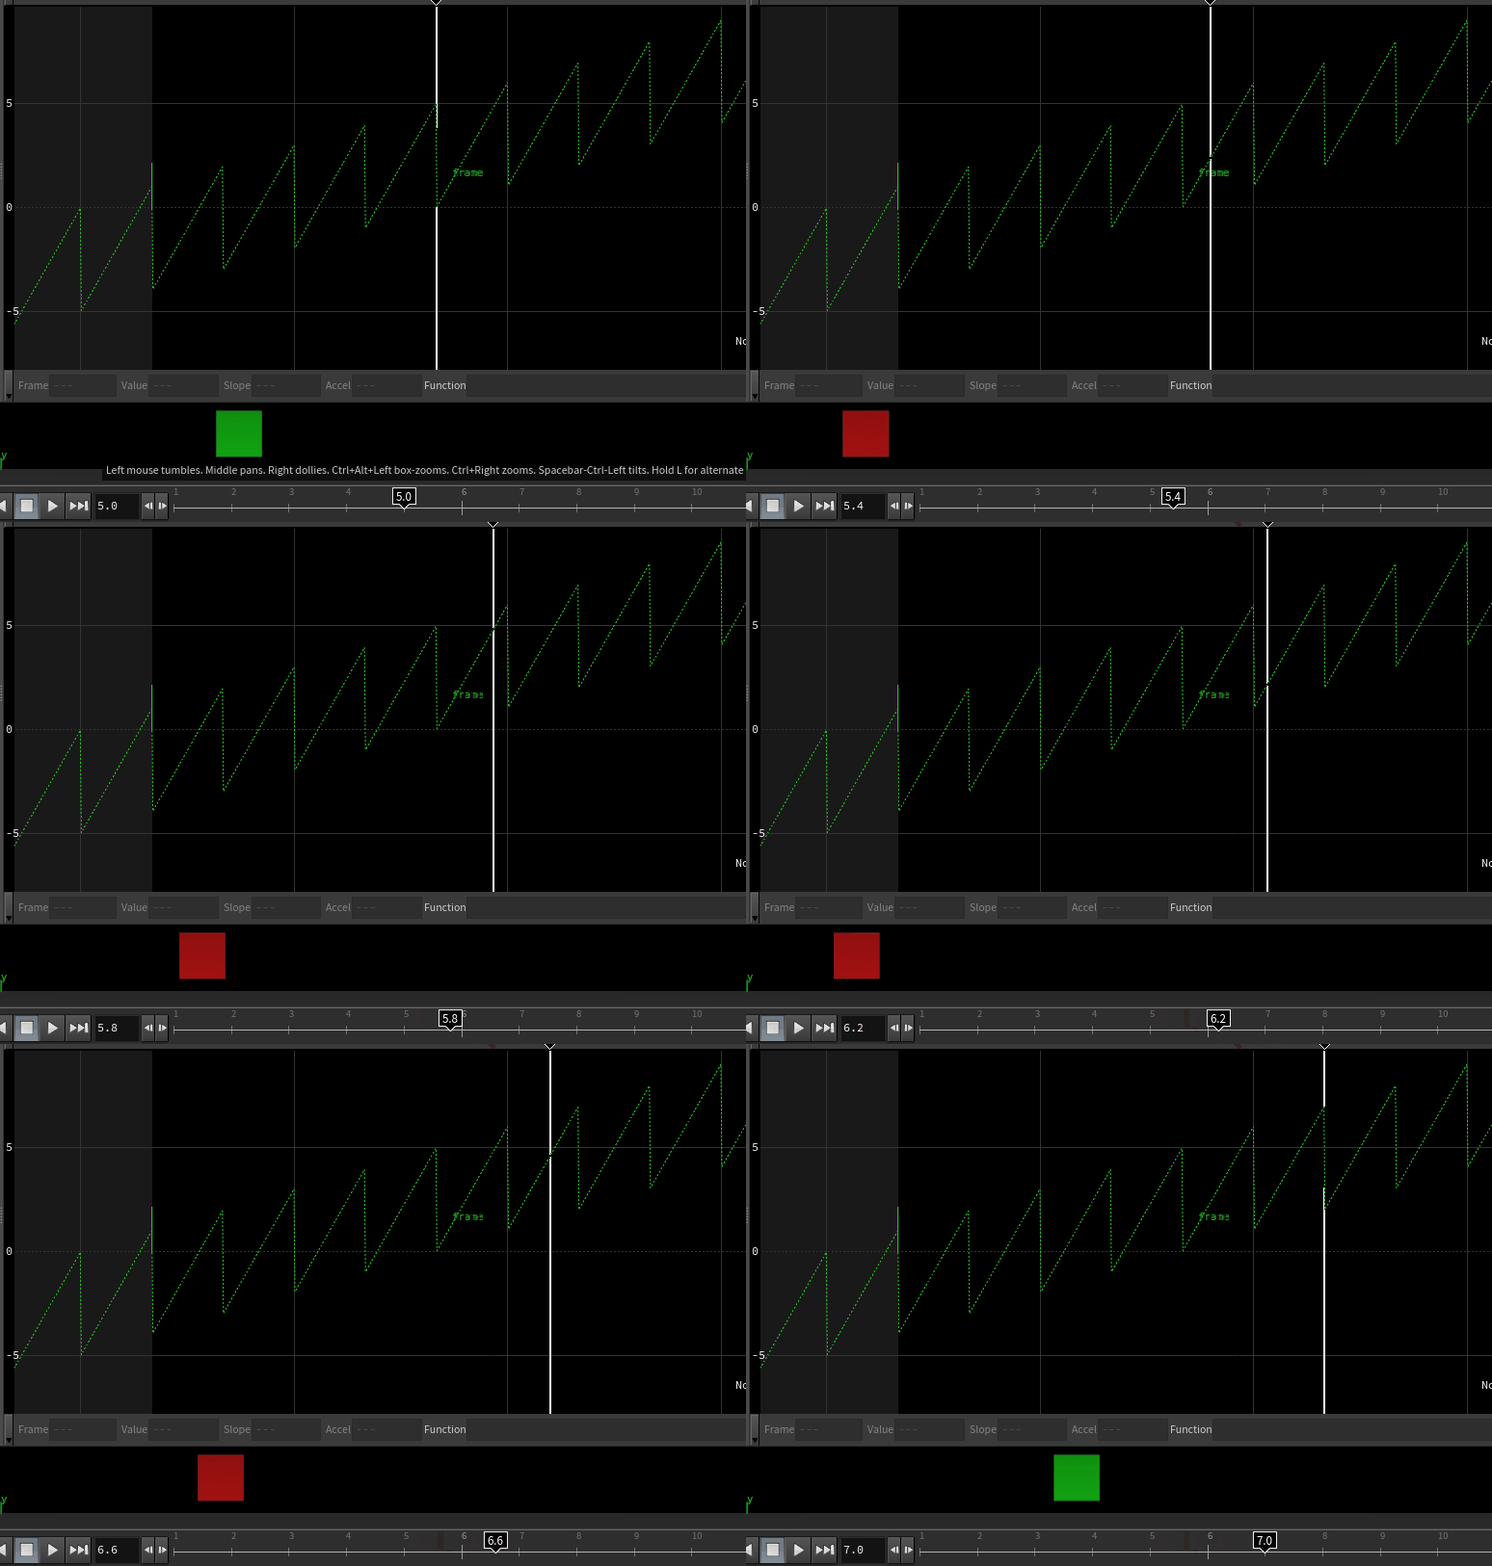 |
The above gif shows what’s happening on the sub frames; the peaks in the graph editor are the “whole frames”, and the valleys are the sub frames. To really hammer it home I’ve coloured the box green on whole frames, and red on sub frames. And the reason I’m really trying to make this part as clear as possible, is that with this ability to influence what happens on sub frames we can create some pretty nice effects, so it’s important that we are on board with how it all works.
| Before I forget; In case you did not know, we can enable sub-frame scrubbing in the bottom left corner of the time line. You will toggle that on and off a lot when working with sub-frames, and for debugging motion blur in general! |  |
How to set it up
Assuming we have some animated geo, the first thing we need to do is to generate a retime curve.
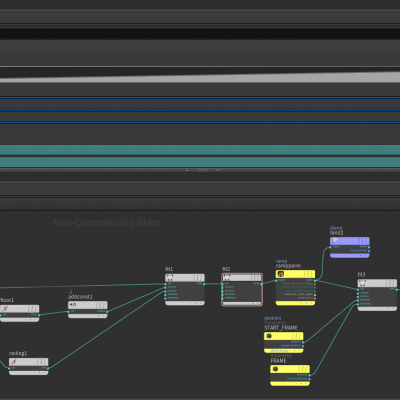
Click the image to see full screen, and let’s take it step by step. I chose to set this up in a vop network, but if you prefer vex I’ll add the code below. I'm running the vop/wrangle node in detail mode as it doesn't strictly speaking has anything to do with the geometry itself, it can be calculated wherever you see fit.
float f = fit(fit(@Frame,floor(@Frame)-1,ceil(@Frame),0,1),0.5,1,0,1);
float rmp = chramp("Ramp",f);
@blend = rmp;
@retime = fit(rmp,0,1,ch("Start_Frame"),ch("Current_Frame"));
Knowing that the global value Frame is a value with decimals we can use the floor and ceiling function and some fit-ranges and a ramp to get a 0-1 value in between each whole frame. I’m outputting that value as an attribute, in my case named blend, as it might prove useful later. For the “retime curve” I’m doing one last fit-range, where I map that blend value to a “start frame” and the current frame. The start frame is essentially how far backwards in time I want my interpolation to go.
|
Ok, we’ve covered the theory twice now, so let’s frame this beautiful box and flipbook it in all three dimensions. Beautiful, but pretty underwhelming.
|
 |
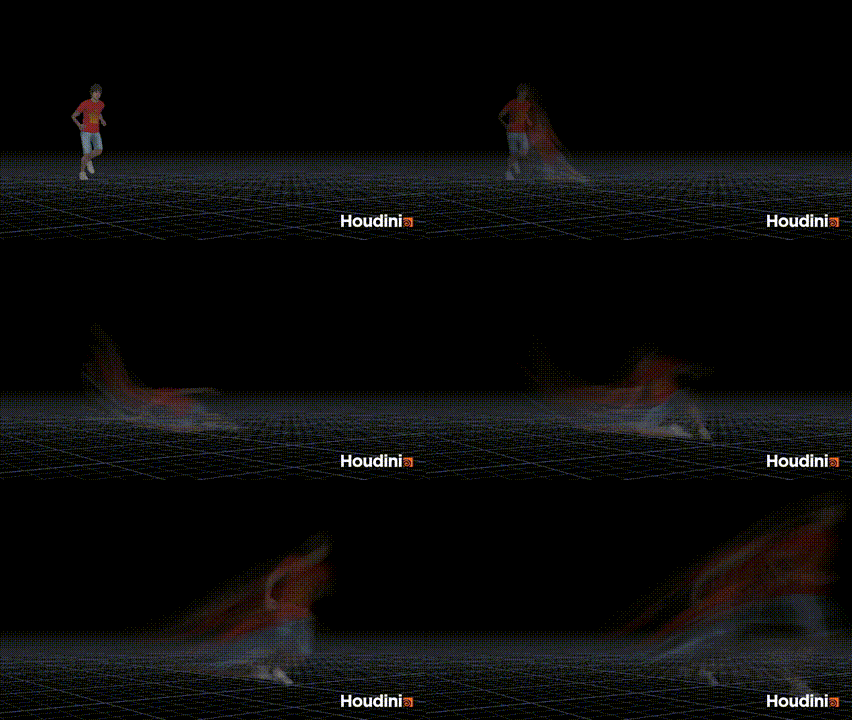
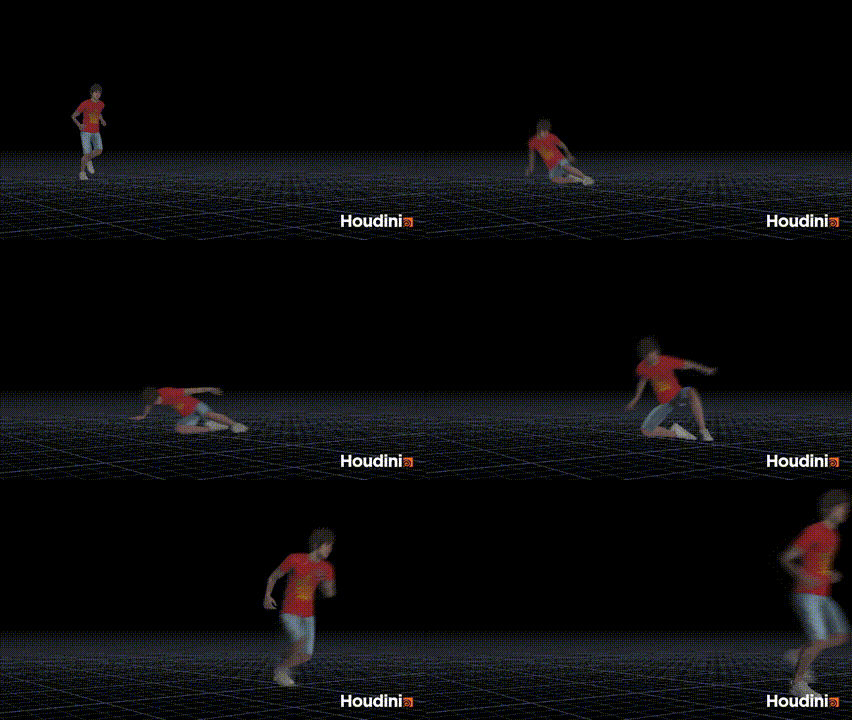
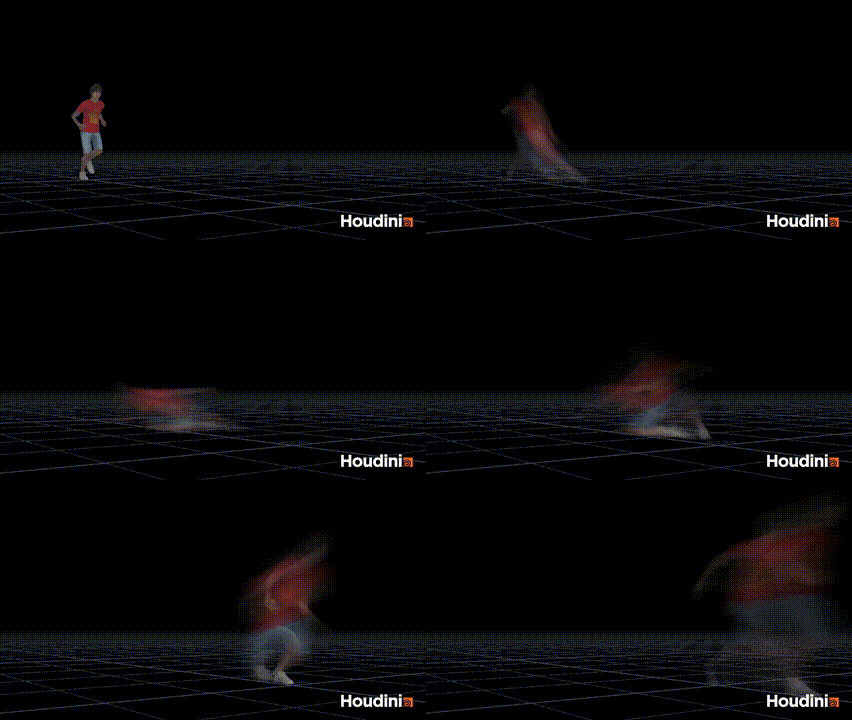
Let’s change our input to something more complex. I fetched an animation clip from Mixamo, but pretty much anything should work as long as you have something that can interpolate cleanly between frames (consistent point count/topology etc.).
 |
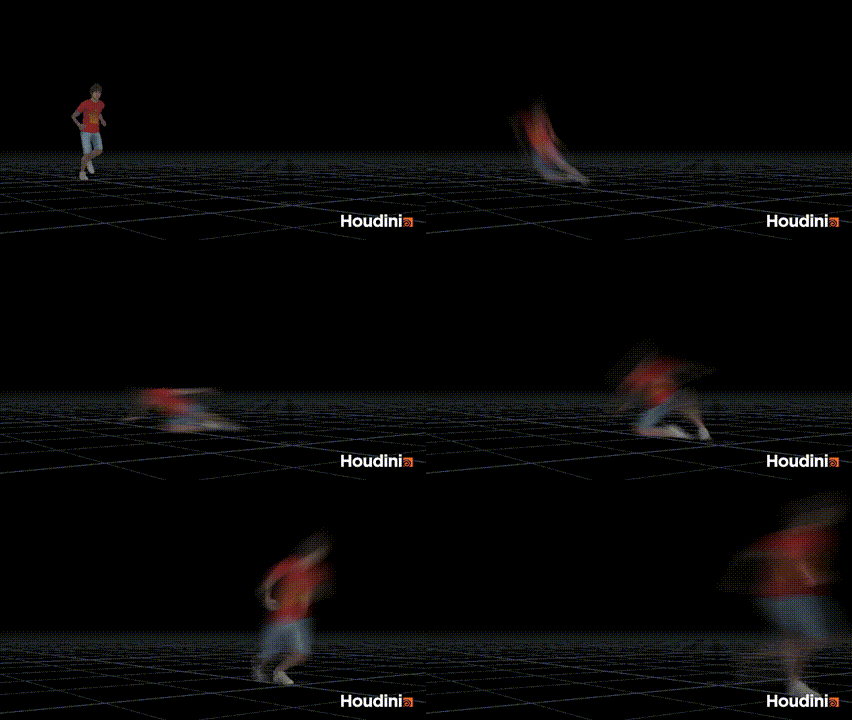 |
| Default/normal(/boring?) motion blur | Var A - Looking ~10ish frames backwards |
 |
 |
| Var B - Looking ~20ish frames backwards | Var C - Combining two different retime curves and blending between them using a noise |
Alright, now we’re getting somewhere! By playing with the start frame values and blending two retimes with noise we almost get a smoke-like quality to the motion blur. And we can keep adding more complexity to it if we wish. And whilst some of you might not find it visually amazing we should consider the following;
- It’s procedural
- It only evaluates/cooks at render time*
- It can be applied on top of any cache where we have consistent topology; like a character with simmed cloth and hair
- It’s versatile; it can be combined with any number of other FX and techniques to add visual fidelity
- Most importantly, we (hopefully) have a deeper understanding of how we can manipulate what happens in between frames and how motion blur works
| * Whilst I would say it’s computationally speaking a relatively efficient technique, it still requires you to work on unpacked geometry, and re-exporting things back out to disk isn’t really feasible either considering the nature of the effect and its existence on sub frames… |
And as promised, the project this technique was used extensively on recently was Madame Web.
Thanks for reading.
