In this post and maybe the next couple, I'll elaborate on some of the visual effects the One Of Us team and myself developed for "The Heart" in the Netflix film Heart of Stone.
The Brief
“The Heart” is the name of the all-knowing all-seeing supercomputer the protagonists, The Charter, uses to plan and coordinate their spy/world-police activities. The Heart appears visually in a few different ways; as a hologram, on screens and as “augmented reality” overlays in first person view shots of agents that are wearing a fancy spy-gadget contact lens.
From the outset we knew a few things about The Heart in it’s hologram form was meant to function in terms of the physical space it occupied on the set(s) and how the characters interacted with it. In terms of its aesthetics, and I’m possibly paraphrasing here, it was described as “a 80’s VHS version of a holographic display”, meaning imperfections, glitches and low visual fidelity were intrinsic to its design.
Another key part to The Heart, and the story, was to convey its abilities to process and analyse huge amounts of data, and although it’s not explicitly said in the film itself, The Heart could be seen as an analogy of AI.
In the next few sections I’ll break down some of the development that went into visualising The Heart.
Lo-Fi Holograms
One of the key abilities the hologram version of The Heart needed was to display three dimensional “footage”. This included 3D representations of environments as well as people and performances.
One approach would have been to go down a traditional CG work-flow of building assets, characters etc. and animating them, and as a last step apply some sort of holographic look through a mix of FX, look-dev and comp treatments. Which is what we did in many cases on this film.
More interesting though, in my opinion, we developed some less ordinary workflows to give The Heart life.
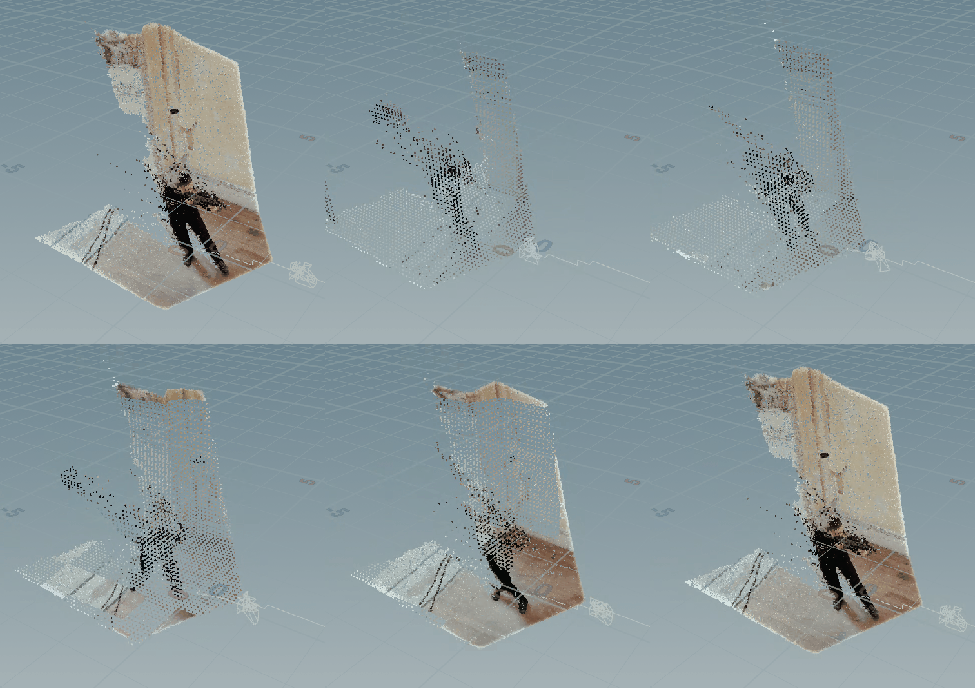
One of the design philosophies behind the all-seeing nature of The Heart was that it could access any device (cellphones, cctv cameras, computers etc.) in the world and access data from it, and from that draw images. So we looked at ways of being able to capture environments and performances and using that as a base for the holograms. This process was very much led by the production side VFX Supervisor, Mark Breakspear, and his team, and in pre-production we did a test shoot using the later generation iPad Pros, that has a built in LIDAR sensor.
To capture LIDAR footage on the iPads we used an app called Record3D (https://record3d.app/), which allows you to capture point cloud videos in a very quick and easy way.
Once we had the footage the next step was to find a way of bringing the footage into our pipeline so that we could work with it. Houdini is our 3D software of choice, and it lends itself very well to those kinds of tasks where you need to manipulate data. So the first tool I built was essentially a Record3D importer for Houdini.
As you can see, the footage has a lot of built-in imperfections and glitches, but for our case that was desired, and if anything we actually ended up adding more glitches and FX on top of the “raw” footage.
One technique we used a lot across our holograms to give them a low fidelity look was to animate a the input of a rint function to get a pixel/voxel-ised look. I always thought of that effect as something that resembles what happens visually in a typical IPR render
Here’s an example of what it looks like in its most basic form in a VEX oneliner:
@P = rint(@P * ch("Freq")) / ch("Freq");From there it’s easy to experiment with various ways of adding break-up and complexity to it. Here’s an example of that

And that concludes the first part of what might be a series of blog posts